Showing posts with label Creative Journaling. Show all posts

Thursday, February 6, 2020

Creative Journaling by Creatively Obsessed

https://www.mymemoriesblog.com/search/label/Creative%20Journaling

Let’s use My Memories Suite to turn journaling into word art. It is easier than you think!!

Begin this tutorial with an active layout in My Memories Suite.
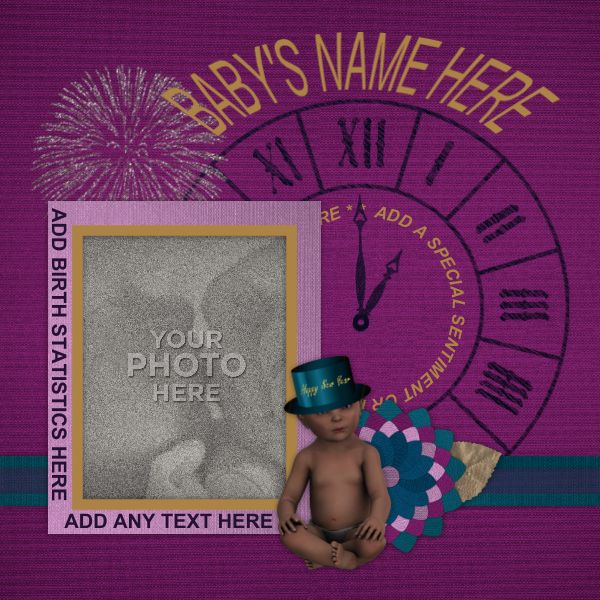
 

I am going to start with the title. In the Control Panel on your right select Word Art. Click ADD then add your text to the box within the control panel tab. If desired move to the approximate location it will be placed on you page by selecting the item on your layout.


Now let’s get creative. I want my granddaughters name to coordinate with the frame it will arch around. I have Enabled the Fill option and chosen Solid Color, then used the Picker to pick the text color right from my layout! Next, I enabled the Shape option and adjusted the arch to line up with the clock face. You will probably need to do some tweaking to get it to fit exactly where you want, the way you want. Try changing the font type or size, repeating words or phrases or rephrasing; to make the text fit the area you need.
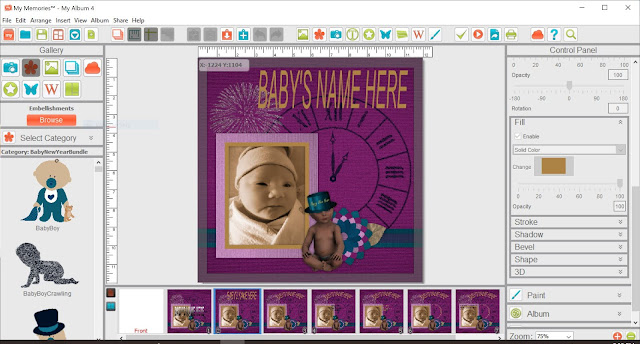


I think it would be fun to add some circular text to the center of the clock face! To do this choose the Text Tab from the Control Panel on your right, click Add. Add Text within the layout and Select a color from the Control Panel.


Now the magic! In the Control Panel Text Tab select Curve. Ta-Da! Again, you will probably have to do some tweaking to get it to fit exactly where you want, the way you want. Play around and have some fun. I like to add a space, then * and another space, between or when repeating phrases.


Finally, I am going to add birth statistics to the rectangular frame.

To do this choose the Text Tab from the Control Panel on your right, click Add. Add Text within the layout and Select a color from the Control Panel. Please where desired. Click on the corners of the text box within the layout and drag them to resize the text box to fit your needs or Right Click, Object Info and enter desired measurements.


In the Control Panel Text Tab select Curve and choose your direction. Ta-Da! If you end up with words rounding corners and letters piling up. Try changing the font type or size, repeating words or phrases or changing the text.


This layout is available in Baby New Year Girl


An 8-page My Memories Suite Digital Scrapbook Album

Made using items from my Baby New Year line.

https://www.mymemories.com/store/product_search?term=Baby+New+Year+COD 
 https://www.mymemories.com/store/product_search?term=Baby+New+Year+COD https://www.mymemories.com/store/product_search?term=Baby+New+Year+COD 
 https://www.mymemories.com/store/product_search?term=Baby+New+Year+COD 

I have a special coupon to thank you for taking the time to read this post.

Be sure to use case sensitive code XCOD25off before it expires on February 20th. 


Sunday, October 20, 2019

Creative Journaling by Creatively Obsessed

https://www.mymemoriesblog.com/search/label/Creative%20Journaling 

Writing a letter in a layout 
Hello Friends!

Welcome to another installment of my Creative Journaling Blog Series. I had planned on sharing something very different with you this month. However, when I went looking for the album I made several years ago, with the journaling style I wanted to share…HORROR…it was missing! I tore my house apart looking for it for over a week and still could not find it. It appears someone did not put it back where it belongs after looking at it and all I can do is pray it turns up. After going through three backup hard drives and checking my projects at my printer, I still can not find it. I could remake the album, but I am not sure I have my original journaling notes and it will take me awhile.

I had to go looking for new inspiration and found this page.


It is another oldie, but one of my favorites. It still brings me to tears reading it today. I made this layout years ago when I worked on the creative team of a scrapbook company that Is no longer in business, so as far as I know, the kit I used, is no longer available.

At the time I made this page, the kids had a running joke as to which one I loved best. Of course, I would say they were all my favorite. Yet, I was sure they did not believe me and just knew I had to favor one of them. I thought about the ways I could prove how each of them is my favorite child in different ways for different reasons. That is when I came up with the idea to make a layout, containing a letter to each of my children, telling them why I love them best. Below are closeup images of the note I wrote each child.


I like the idea of writing notes to your loved ones for them to find in your scrapbook, even after you are gone. Especially since, we all have things we feel or think yet never seem to get around to saying out loud. Sometimes we may have a hard time expressing ourselves verbally.

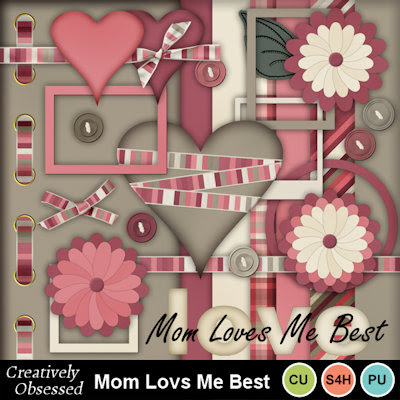
If you happen to want to make a “Mom loves me best” letter layout I have created a freebie to get you started. Just click on the image to download.

https://www.mymemories.com/store/display_product_page?id=XCOD-EP-1910-170809

This freebie was made using my kit “Mom Loves Me Best”.


https://www.mymemories.com/store/display_product_page?id=XCOD-CP-1910-170807

There are so many ways you could go with the letter in a layout theme. I am including some inspiration below. Naturally the ideas mentioned could be used, mixed and matched, for the various people mentioned and more.

For a baby: Tell them how you felt when they were born. What the world was like. Your hopes for their future and more. It would even be fun to write a note every year as they grow.

For a child: Tell them how proud you are of them and why. Recognize their admirable character traits How they have affected your life, the world and more

For a parent or spouse: Tell them the various ways they have impacted your life. How much you appreciate various things about them or the things they do. How they have inspired you and more.

Write a note to yourself, saying how proud you are of yourself for overcoming or getting through a difficult situation. Graduating college, getting that job you always dreamed of etc.

Thank you for taking the time to read this. I hope I was able inspire you to make a letter layout. If you have any questions, please leave a comment below. I would LOVE to see any letter layouts you make, if you are willing to share. 


Have a great rest of the day!

Get $10 off MyMemories Suite Software

Use code STMMMS32018 at MyMemories

Creatively Obsessed Store
Creatively Obsessed on Facebook
Creatively Obsessed Twitter
Creatively Obsessed Blog
Creatively Obsessed Pinterest

Thursday, August 8, 2019

Creative Journaling by Creatively Obsessed


Bullet Point Journaling for Scrapbooks

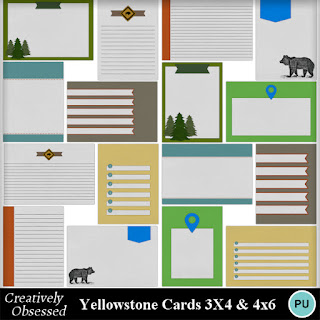
The latest scrapbooking fad is the use of bullet point journaling. This format is especially useful for those who have difficulty with creative writing or for scrapbooking events in which you do not remember every detail. To get you started, I have a special freebie for you. Click here to get these two Bullet point Journal Cards for FREE.


These cards were made using Yellowstone National Park, part of my Yellowstone collection.

https://www.mymemories.com/store/product_search?term=Yellowstone+cod 
 https://www.mymemories.com/store/product_search?term=Yellowstone+cod https://www.mymemories.com/store/product_search?term=Yellowstone+cod
https://www.mymemories.com/store/product_search?term=Yellowstone+cod https://www.mymemories.com/store/product_search?term=Yellowstone+cod

 Bullet point journaling is simply put, just about the basics. As with any type of bullet pointing there are a few simple rules you can follow to achieve the most impact.

Bullet point journaling for scrapbooks made simple:

  • Think of a bullet point like a headline. It should to be short and specific.
  • Highlight what is important to understanding the content of your page. Simply state what you want to document about your page
  • Keep it simple. Don’t get too wordy.
  • Stay on theme. Bullet points are about specific topics, don’t get off track.
  • Make bullet points symmetrical. As I have done here, if following a list format.
  • Use keywords. Use words important to the content of your page.

Grammar basics

Bullet points can be confusing. Should you capitalize each one? Should you use periods? Should you use numbers instead of bullets?

Introductory sentence

If the text introducing your list is a sentence, it should end with a colon. If it is a fragment or single word, jump straight to the list.

Numbers or bullets? If you want to document the specific order of events use numbers or even the time of day.

Punctuation

If your text t is a complete sentence, use capital letters and proper punctuation. If the points are not structured as a sentence, you do not need to end with punctuation; the use of capitalization is a style choice. I prefer to start each line with a capital letter.

Structure

The points should be consistent, all sentences or all fragments.

Start each bullet point with the same part of speech such as, verbs,, etc. I did this in my previous example. Read each bullet point with the preceding text to make sure it makes sense as a sentence.


Thank you for taking the time to read this. I hope I was able to answer any questions you might have regarding bullet point journaling. If you have additional questions, please leave a comment below. Even if you don’t, I always love to hear from you. Have a great rest of the day!

Get $10 off MyMemories Suite Software

Use code STMMMS32018 at MyMemories

Creatively Obsessed Store

Creatively Obsessed on Facebook

Creatively Obsessed Twitter

Creatively Obsessed Blog

Creatively Obsessed Pinterest