

Grab a cup of coffee and enjoy this tutorial.
For this layout I used my newest collection Coffee Addiction which is now is store with 25% off.

Open My Memories Suite.
Now we don't want to create an album but just one layout so we click at Design set Custom Size at:
Width: 12
Height: 12
Units: Inches
Aspect Ratio: Square
Quick sizes: 12x12
Don't click any other option only click Create and only one transparent page will open.
Step 1: Open a background (right sight panel) of your choice.
Background-Add and search a background you like.

Step 2: Open the Photo's panel (right sight panel) and click Box (this will create a photobox)
Step 3: Select your photobox (just click at it) and in the Photo's panel click at Shape and select Circle/Oval.

Your square photobox will turn into a circle.
Step 4: Stretch your circle by holding down your left mouse button and clicking at one of the little grey blocks around the circle.

Now just drag to one side and the circle becomes a bigger.
Step 5: Select your circle and open the Photo's panel (right side panel) now click at Add and search a paper of your choice instead of a photo.
Drag this into the circle until it covers your circle.
Select your circle and click Photo's again (right side panel) and click at Shadow, I use the one that is already in the program.
Step 5: Drag the circle to the right sight half of the page.
Step 6: Repeat step 2,4 and 5 only this time we will make the photobox rectangular by stretching it to the the left and right and a bit to the top of the page.
Make sure your rectangular is in the middle of the page ( click on the rectangular-right mouse button-Align-use both options you see)
Click at your right mouse button with the rectangular selected and click Send to back.

Step 7: Now at a new photobox this time for the photo, give it the shape you like.
Add a photo to it the same way you add a background to it by step 5 only now you need to search for a photo and drag this into the box.
*Open the Photo's panel again with your photo selected and click at Matte, choose a color you like and click ok.
Now the color you choose is around your photo.
Add a shadow to you photo by selecting your photo, open the photo panel and click Shadow.
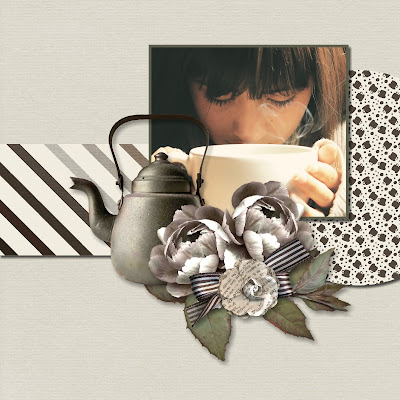
Step 8: Now it's time to add some embellishments to the page.
Open the Embellishments panel at the right sight and click at Add.
Open Leave 2 in the embellishments folder drag it where you like and add a shadow.
Open the Coffeepot in the embellishments folder drag it where you like and add a shadow.
Open flower 7 add a shadow and drag it where you want it ( I made mine smaller)
Open the same flower again and click in the Embellishments folder at Mirror.
Drag the second flower where you want it and add a shadow to it.
Open Bow 1 add a shadow and drag it where you want it.
Open Flower 8 add a shadow and drag it where you want it.
You are welcome to play around with the photoboxes and embellishments the way you like it the most.
If you use my Coffee Addiction bundle, don't forget to use the Wordart.
Step 9: Save/Export your page.
Open the Share panel ( right side panel)

Make sure all settings are right and click export.

*= Optional
No comments:
Post a Comment