
Using SVG Shapes in My Memories Suite by Albums to Remember Designs
One of the features in My Memories Suite (MMS) is shapes. Shapes are great because they are SVG files meaning you can add them to your page and change the size of them without losing quality.
What is the difference between SVG and PNG files?
Great questions. PNG files are meant to stay the size they are. If you enlarge them too much they will end up being jagged and pixelated when you print your pages. They are meant to stay about the size the designer made them. There is a bit of room to make them slightly smaller or bigger but not a lot. SVG files are meant to be enlarged and made smaller. You can change the size to suit your needs and not have to worry about the quality of the shape when it prints.
How do you add shapes to My Memories Suite?
Some of the designers have created SVG shape sets that you can purchase in the store and they will download directly into your shape folder in MMS. You can view a variety of sets I have made here.
How do you use shapes in My Memories Suite?
Using shapes in MMS is very easy. Click on your Shapes tab, choose Add (green circle with star) on the left side menu. Once the window opens you will choose Purchased, here you will see a list of the shapes you have purchased from the store. (See highlighted areas below). Once you choose the set you want they will show up on the left hand side of the window. Choose the shape you want and press Add/Close at the bottom of the window.

What do I do with my shape now?
Now that you have added your shape you can change the size by clicking on the corner square (see yellow highlight below). Grab and drag the square until you have the size you want. Once you have your ideal size you can add paper, change the color, or add a photo to the shape. All you need to do is choose what you want to do from the Shapes menu. Below you can see that I am choosing to add paper by clicking on the paper button.
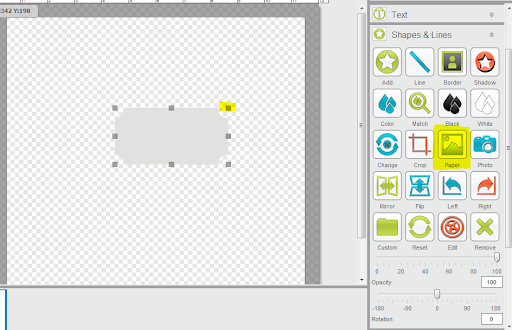
Once you choose the paper button a window will come up that allows you to choose your paper (see below). Choose the kit or category, scroll through the paper you want to choose and click on it, press add. As you can see I have chosen the navy paper with gold stars.

This is what it should look like once you have added the paper.

Now you can add a shadow by clicking on the shadow button in the Shapes menu.
Important tip: You need to change the size of your shape BEFORE you add paper or a photo. Otherwise you will enlarge/stretch the paper/photo in a way that it was not meant to be changed and it could end up being low quality when you print. It is best to keep paper to the size the designer designed it at. If you want to change the size of the shape after you have added the paper, just re-add the paper once you have your new size. Hopefully that makes sense!
Enjoy scrapbooking with some new shapes from the My Memories Suite store!
No comments:
Post a Comment