

Hello friends!
My name is Michele and I am Creatively Obsessed.
Would you like to make a large album quickly?
I often have hundreds if not thousands of photos from a single event or trip. While these memories are precious, it can be tedious to scrapbook so many photos. That is where My Memories Suite comes in! It makes the task so much easier with a few different options. The one I am covering today is the AutoBuild feature.
Supplies you will need:
- My Memories Suite Software
- Lots of photos
- Optional kit
Know where your photos are stored on your computer. This is the time to remove photos you do not want in your album. Delete or move them into a subfolder. The program will load only the photos in the folder you choose later in this process.
Open your copy of My Memories Suite. From the initial screen there are a few options offered to get you started, click AutoBuild.


The Professional Print Options box will appear.


This is where you choose the type of project you want to create Click Photobooks.
The Photobook Print Sizes box will pop up; click your desired size.


The software will finish opening and the AutoBuild box will pop up.


The first row in the AutoBuild box is for selecting the photo location on your computer, click Change.
The Open (file location) box will appear.


Find your file location, double click so it appears in the top “Look In” row then click select folder you will return to the Autobuild box.


The second row is the sort by option. I sort by date, to place the pictures in the order they were taken.
The third row is for selecting how many photos you want per page. The program will automatically select all options. If you do not want this click the boxes you do not want to unselect them. I often use the 4 and 5 photo options giving me the least amount of pages needed to create my album. This saves time as the program will not make as many pages and money when it is time to print.


The last option is to cancel or create, click create.
An autobuilding progress bar will pop up, the photos will begin loading and the program will build your album automatically!!


When your photos are finished loading the progress box will disappear and you will see the pages across the bottom of your screen.


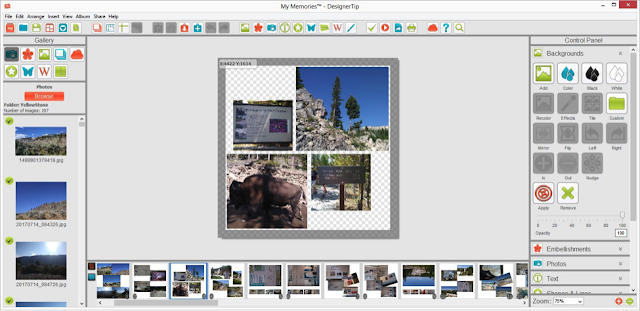
Note all your photos will have a check mark inside of a green circle. Showing it is used in the album. As you select each page you can see which photos are on that page by selecting the layers pallet on the left side of your screen. If needed, you can rearrange pages by selecting and dragging across the bottom.


If you are unsatisfied with the layout of any page created automatically; select the page, click on the photo layout gallery on your left then select the layout you want. I duplicated a page I did not like and changed the layout to show you what it looked like before and after.


At this point, I recommend looking at each page of your album. You want to make sure none of your photos are cropped too far in one direction. If they are you can adjust this in the control panel by selecting the photo and either zooming or changing/clearing a possible crop made for the shape of the photo space in the layout created. If you clear a crop from a photo you may need to reposition or resize it. To resize drag in or out from the corners.
The only drawback of the autobuild option is vertical photos occasionally load horizontally, horizontal photos may load vertically or a photo may even load upside down. This does not happen often, however when working with a lot of photos, it is possible. This occurs because the actual pixel data is saved in the way that My Memories Suite Imports the images. The difference is that some programs can read an embedded rotation tag in the EXIF data of the image. Unfortunately My Memories Suite cannot read that EXIF data to determine if a rotation is necessary and imports the image in its raw pixel orientation.

 If this happens, select the photo and change the rotation in the control panel on the right of the screen. After rotating, you may need to change the position of the edited photo or others to create a pleasing layout.
 When you are sure your photos appear as you want them, we are ready to move on.
Select the backgrounds tab in the control panel

 The program offers a choice of black, white or custom colors or you can add your own background. The color options should be self-explanatory. I will cover options for using paper backgrounds.
 1) You can use a previously purchased background or one provided in the program. Click Add in the backgrounds tab of your control panel. This will bring up the Paper Box.

Find the appropriate file, and select a background. Now the add button in the bottom right of the Paper Dialogue box is highlighted.


Click Add this will place the background on your current page.
2) Use backgrounds stored elsewhere on your computer by clicking Add in the backgrounds tab of the control panel.

This will bring up the Paper Dialogue Box, click Browse.


The look in box will appear, Select the file location and desired background. Then click OK.


This will place the background on your current page.


Any background choice applied to your current page can be applied to all the pages automatically! I love this feature, it saves time; we are making a large album quickly. Also when my book is open and you see two pages at once they will match no matter how many pages are in the album.
Do this from the backgrounds tab in the control panel, click Apply.

This will bring up a Confirmation Box
 .
.
Click yes, the program will now rebuild with the background applied to all pages. Yippee!
Now let’s add photo shadows, this can also be done to all photos at once!! To do this select a photo, the photos tab will open in the control panel.


Click shadow, the shadow properties box will pop up.


Here you can add shadows to a single photo, all the photos on page or all photos the album. The program automatically provides a shadow option with a vertical and horizontal offset. If you like it, use it. I prefer shadows that provide depth all the way around my photos. To change the offset use the arrows on your keyboard. You will see the Pixel Offset numbers changing just below your photo in the shadow properties box.


Because we are making a quick album, select “All photos in this album” and click OK.
We have completed a basic quick album!
If desired, you can take this further, by adding text and/or elements. Just select the appropriate tabs in the control panel on your right or the gallery on your left . (You can also apply shadows to all your elements at one time!)
When printing, the first and last page of your album will be the automatic cover choice made by the program. There is also leather option or you may want to create a custom cover. To create a custom cover, insert a page at the beginning and end of your album by right clicking on the first and last album pages. Insert a page before the first page for the front and after the last page for the back cover. You will have the option of inserting a blank page or a page template.


Make your choice, click ok and create the cover. Please note, if you want the spine to match the front and back covers, choose a color. The only option for a custom spine is a color you will choose when you send your order to My Memories.
When you are ready to print your book, select share from the control panel, then click book.


The Album Upload box will appear.


Here you choose your cover type, add text to your spine and choose your spine color. When ready, click Upload. The program and site will guide you through the rest.
Thank you for taking the time to read my Designer Tip. I hope you find it informative and you enjoy making large albums quickly and easily in My Memories Suite as much as I do. Happy Scrapping!!
No comments:
Post a Comment