

Designer Tip: March 30
Getting Your Feet Wet Without Drowning
skill level: beginner
Designer: Diane {ADB Designs}
Getting Your Feet Wet Without Drowning
skill level: beginner
Designer: Diane {ADB Designs}
Some of us are more confident than others when learning new software. I tend to fall in the middle; I know I am unlikely to "break" anything but I am still cautious and can become frustrated when I cannot find what I think I should be able to find LOL
If you are a newbie to MyMemories Suite I recommend using Stackers, Quick Pages and pre-made clusters/frames to help you create pages quickly while learning. The great news is you can often snag these for free or low cost. Take a look around the FREE KITS area of the store.
If you are a newbie to MyMemories Suite I recommend using Stackers, Quick Pages and pre-made clusters/frames to help you create pages quickly while learning. The great news is you can often snag these for free or low cost. Take a look around the FREE KITS area of the store.
There is a set of TWO QPs from Over the Fence Designs' HELLO FRIEND Collection (PattyB Scraps and I collaborate to create these collections) you may want to use one of these as you experiment with MM Suite.

and I have a new freebie from my Pear Butter & Strawberry Jam collection I will use for this exercise.

Just click on the previews to go to the products in my/our store - put it in your shopping cart and check out. Download your "purchases" to the software and you will be ready to work with them! FYI: The PEAR BUTTER collection is on sale through next Sunday! :-)
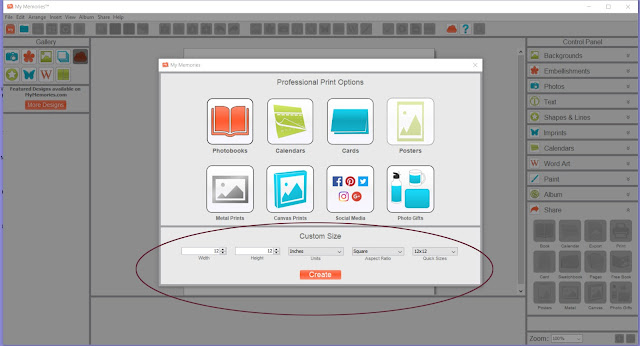
Step 1 - Open My Memories Suite. From the "Welcome ..." window select "Design". A new window will open, look at the bottom the the "Custom SIze" area: the dimensions should be 12 Width, 12 Height, Inches Units, Square Aspect Ratio, 12x12 Quick Sizes. Click on the "Create" button.
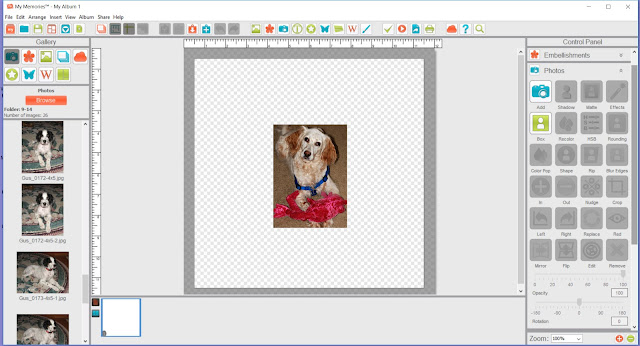
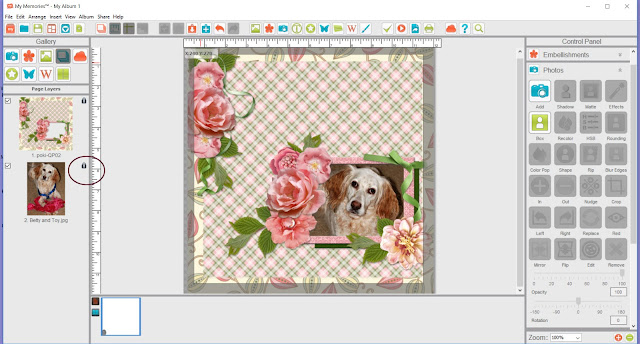
Step 2 - Open the "Photos" menu in the "Control Panel" and click "Add". Browse to the photo you want to use in the QP; double click to add it to your empty canvas.
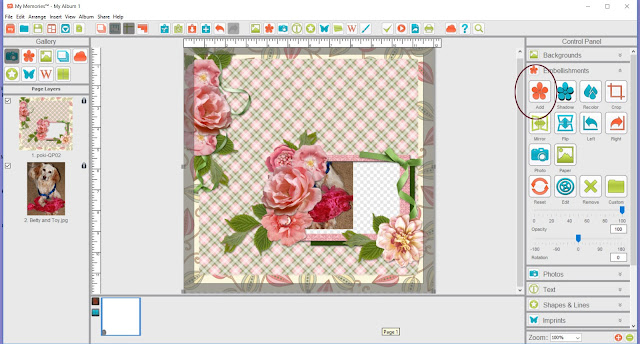
Step 3 - in right hand menu select Embellishments and Add ... a Quick Page is an embellishment just as a cluster is. A Stacker is a Paper. Look for the QP in your Purchased products and double click it to open. NOTE: If you are looking for a QP you have saved before you acquired MM Suite, simply use the Browse button on the bottom left of the open menu to search through your computer folders.
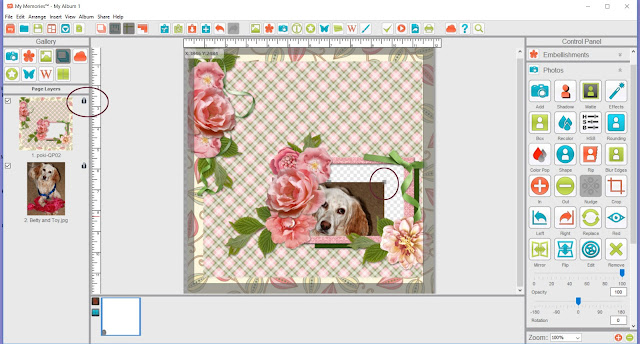
Step 4 - in the "Gallery" menu (top left) select the stack of papers image - the is your "layers" view. You are shown the page layers. Lock the QP layer and select your photo by clicking it. In your working window, move your photo to show in opening of the QP.
Step 5 - Resize your photo as required. Grab the grey square (top right of image) and increase or decrease image size as needed, move the image for final spot and lock the photo layer.
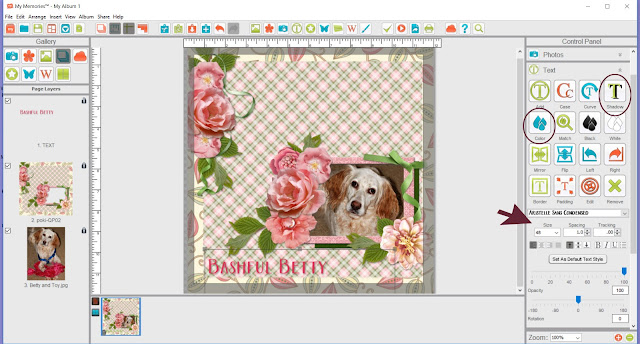
Step 6 - Add a page title and some journaling. Open the text menu in the Control Panel; click "Add". A text box will appear on your work in progress and the menu will show you all kinds of option. Play with color, font style and size. Have fun! NOTE: If you are going to be working on multiple pages all for the same album you may wish to click the "Set As Default Text Style" so that you do not have to continuously change the font (or forget to do so, like I would be inclined to do.)
Step 7 - Save your page - You may save to an existing album or create a new one. I created a new album - called Our Dogs to put all the layouts i create of our English setters. (We have two!)
No comments:
Post a Comment